Difference between revisions of "Time synchronization"
Jump to navigation
Jump to search
| Line 6: | Line 6: | ||
<code>dtoverlay=pps-gpio,gpiopin=18</code> | <code>dtoverlay=pps-gpio,gpiopin=18</code> | ||
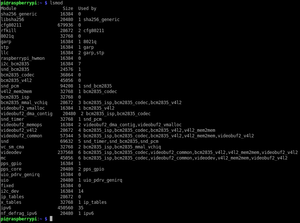
| − | This will activate the kernel pps driver module at startup listening to GPIO pin 18 to which the timepulse output of the uBlox is connected on the MuonPi HAT board. After a restart, one should see the activated driver in the kernel module list | + | This will activate the kernel pps driver module at startup listening to GPIO pin 18 to which the timepulse output of the uBlox is connected on the MuonPi HAT board. After a restart, one should see the activated driver in the kernel module list. |
[[File:Lsmod-pps.png|thumb|lsmod showing the loaded pps_gpio kernel module]] | [[File:Lsmod-pps.png|thumb|lsmod showing the loaded pps_gpio kernel module]] | ||
| + | |||
| + | To test the pps functionality, the command-line-tool <code>ppstest</code> may be used (install with <code>sudo apt install pps-tools</code>. | ||
Revision as of 13:36, 10 March 2021
This tutorial describes, how to set up the time synchronization of the system clock by disciplining the kernel of the RPi with the Ublox's PPS (Pulse-Per-Second) signal using chronyd.
Install the pps kernel driver module
Edit the /boot/config.txt and add the following line:
dtoverlay=pps-gpio,gpiopin=18
This will activate the kernel pps driver module at startup listening to GPIO pin 18 to which the timepulse output of the uBlox is connected on the MuonPi HAT board. After a restart, one should see the activated driver in the kernel module list.
To test the pps functionality, the command-line-tool ppstest may be used (install with sudo apt install pps-tools.
